


Creating and managing a project
Creating a project
To create a project, access the "Project" tab from your interface. Depending on the roles assigned to users, some will be able to create and manage projects. This flexibility allows you to organize your analyses according to specific criteria to refine your results.
During creation, you can define a name, add a detailed description and configure access rights to guarantee optimal, secure management.
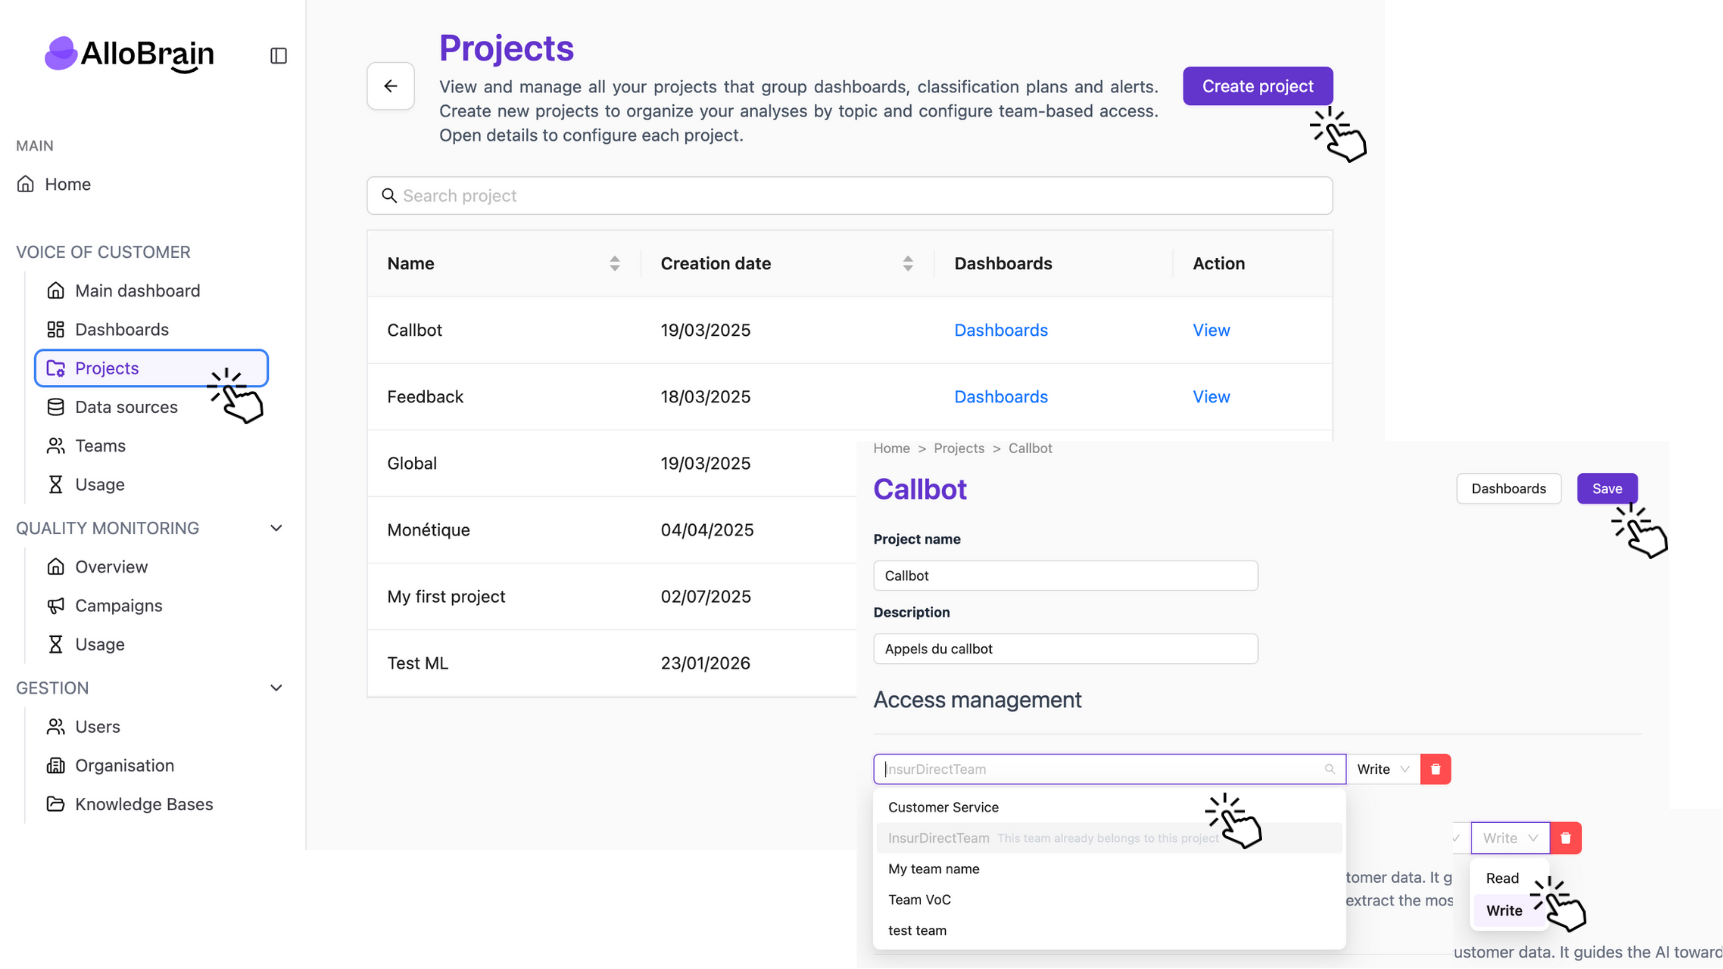
The Projects page lets you access and configure the various projects available on the platform. You'll find several options for consulting dashboards, modifying classification plans and managing general project parameters.
View a project
From this page, you can :
1. By clicking on the "Dashboards" button :
- Access dashboards: you can view the analyses and visualizations associated with each project.
2. By selecting "View":
- Access management: you can modify access to the project.
- Create Analysis Axes: You can add your own analysis axes and increase the accuracy of the AI analysis.
- Modify the classification scheme: You can adjust the classification scheme used by the AI to analyze reviews and associate them with relevant topics.
- Add alerts: you can receive real-time notifications about priority topics.
Creating a classification plan
- Access: On the list of projects, click on "View" for the relevant project.
- Navigation: Scroll down to "Classification Plans" and click "Add a Classification Plan."
- Configuration :
- Name your plan in the "Plan name" field.
- Select the analysis axes that interest you (Key points, Suggestions, Reasons for contact) and click on "Create" -> you can modify this selection at any time.
- Connect this classification plan to data sources
- Add your business topics: you can generate initial topics using AI (click on "Apply changes") or write them directly by clicking on "+ Add your first topic."
- Click on "subject label" to name your subject + add a classification rule and examples
- Click on "+" to create subtopics that expand on a topic.
- Click "Save" to finalize
The plan will appear in the list of filing plans on the "General Settings" page.
Modifying a classification plan
- Access: On the list of projects, click on "View" for the relevant project.
- Navigation: Scroll down to "Classification Plan," select the Classification Plan you want to modify, then click "Modify."
- Possibility of modification :
- Change the name of your plan in the "Name" field
- Add main topics via "Add root topic" or modify them, add descriptions or examples.
- Edit or create subtopics by expanding a topic (+)
- Associate or delete data sources
- Click "Save" to finalize
A confirmation pop-up will appear at the top of the page.
Project details
Click on "View" to access the project parameters, which are divided into several sections:
General parameters
- Change project name
- Add or modify project description
Access management
- View teams with write permissions on the project
- Add new teams and manage their access rights
Areas of analysis
- Create analysis axes to refine the classification plan.
Classification plans
- Display a table listing the different file plans available
- Modify each file plan using the "Modify" button
Alerts
- Create Alerts on Priority Topics
Access management
Teams

Teams can be added to a project with two levels of access: READ (read-only) or READ & WRITE (read and modify).
- All users belonging to a team with access to the project can view the associated dashboards.
- Team members with WRITE access can create and modify project dashboards in addition to viewing them.